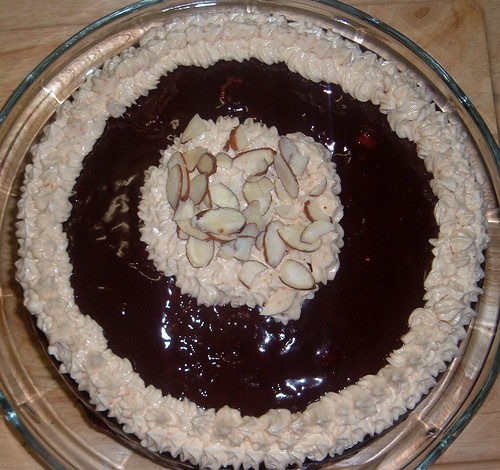
This was my second Daring Baker Challenge and I just got this puppy done! Nothing like waiting till the day before it's due to be posted to getter done. To Read More, Click On The Recipe Title.
This was a lot of work for one day, I should have split it up into a couple days but no not me, I would've missed the stress, I thrive on it. Our host for this months challenge is Chris from Mele Cotte. She picked a Filbert Gateau with Praline Buttercream from Great Cakes by Carol Walter. This cake was a great learning experience for me, and that's what I wanted when I signed on to the Daring Bakers. We were given options as to nuts, the original recipe called for filberts or hazelnuts. I couldn't find hazelnuts so I went with almonds. We also had our choice of fruit glaze,the recipe called for apricot, I went with raspberry. The only alcohol I used was the Grand Marnier. Basically this whole recipe was one big baking lesson for me. There was nothing in this recipe that I had ever done before, nothing. Was I scared ......YEAH!! But I stared fear in the face and hopped (hee hee) along! I loved making the cake portion of the recipe. Loved it!! It was something new, different and exciting to me. I was learning something and that's what I love about the Daring Bakers. Learning. So we're going to start from the very beginning what did I learn?
1. I learned how to toast and skin almonds. I never did that before. It wasn't hard to toast the almonds, getting the skins off, not easy. I picked up an almond after it was toasted and tried to skin it, it wasn't happening, there has to be an easier way. So I went on line and found out if you boil them for a minute in water there skins come off faster than skimpily dressed stripper in an old burlesque show. They were done in no time. No picture of the naked almonds, this is a kid friendly blog.
2. Making the cake flour was really neat using the almonds, cake flour and the corn starch and putting it into the food processor. I made my own flour for the cake! Whipping the egg yolks and the egg whites up and combining them, adding the cake flour, then the clarified butter,being careful with the batter so it didn't deflate. it was a beautiful thing when I was done with it.
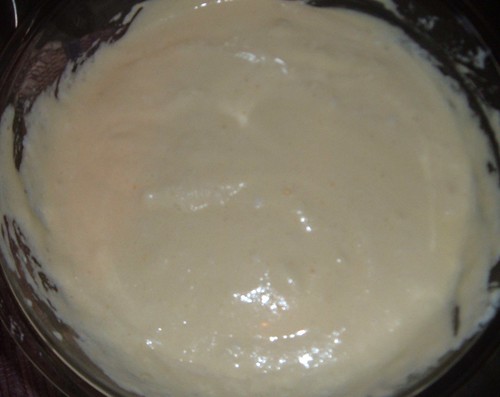
The cake rose up just the way it should have , I was proud!! It was springy to the touch and pulled away from the sides just the way it was suppose to. I made it in a 10 inch spring form pan.
3. I learned how to make the raspberry glaze and the sugar syrup to put on the cake after it was baked.

4. I cut a cake into a layer. Ok it was a bad bad layer but I did it. When it came time to cut the cake ( it was suppose to have 3 layers) I thought about putting toothpicks around the cake to help me know where to cut it, like I've seen in cookbooks. But knowing me, I would have had so many toothpicks in it that it would have looked like some kind of acupuncture torture so I decide to just do it, throw caution to the wind! Next time I cut a cake I'll use the toothpicks. Sigh.
5. I made almond paste, making the almond brittle took me alittle time, I burned the first batch of sugar! Then I got it right and made the brittle

Then the brittle turned into almond paste in the food processor!
6. I learned how to make Swiss Buttercream frosting. This was the best frosting I've ever made! My husband said it tasted like whipped cream, it was wonderful!! I loved making this, I was a little apprehensive because of the problems other Daring Bakers had with it, I must have had beginners luck cause nothing at all happened that wasn't suppose to happen. Look how pretty it turned out!!
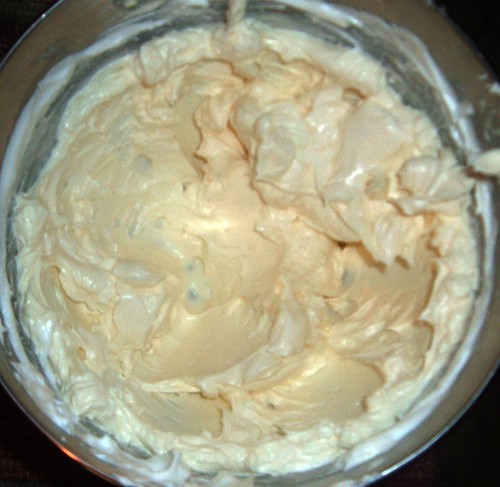
I will definitely be making this again in my kitchen! Then I made the Praline Buttercream.
6. I learned how to make a Ganache Glaze and pour it over a cake, it was messy, it didn't cover it the way I would have liked on the sides but it was my first attempt and I will do it again.
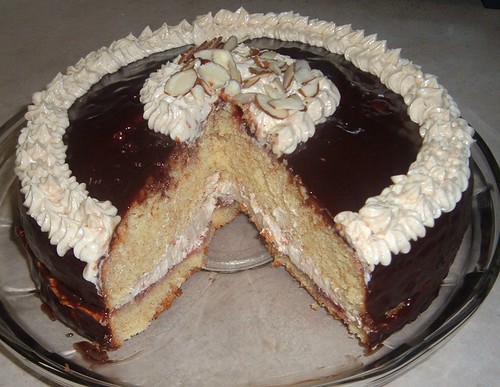
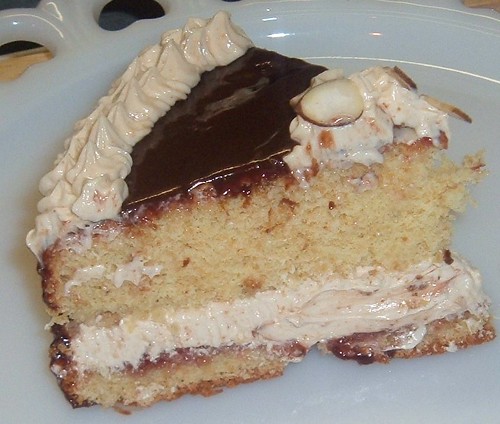
All this work and all the new techniques I learned paid off and gave me a cake that didn't turned out to bad. I could have done with out my hand print on the top of the cake , don't ask. Thats why the ganache looks alittle lumpy on the top. I tried to cover it by decorating but evidently I have a big hand. So here it is in all it's glory, my Filbert Gateau With Praline Buttercream! Thank you Chris for a great learning experience!!
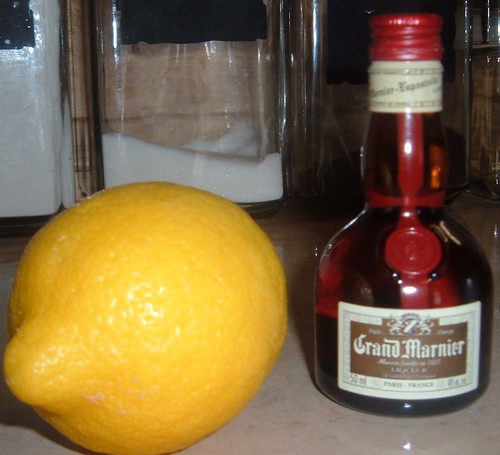
I have to show you my teeny little bottle of Grand Marnier! Is that cute or what!
Filbert Gateau with Praline Buttercream
From Great Cakes by Carol Walter
1 Filbert Genoise
1 recipe sugar syrup, flavored with dark rum
1 recipe Praline Buttercream
½ cup heavy cream, whipped to soft peaks
1 recipe Apricot Glaze
1 recipe Ganache Glaze, prepared just before using
3 tablespoons filberts, toasted and coarsely chopped
Filbert Genoise
Because of the amount of nuts in the recipe, this preparation is different from a classic genoise.
1 ½ cups hazelnuts, toasted/skinned
2/3 cup cake flour, unsifted
2 Tbsp. cornstarch
7 large egg yolks
1 cup sugar, divided ¼ & ¾ cups
1 tsp. vanilla extract
½ tsp. grated lemon rind
5 lg. egg whites
¼ cup warm, clarified butter (100 – 110 degrees)
Position rack in the lower 3rd of the oven and preheat to 350 degrees. Grease and flour a 10” X 2” inch round cake pan.
Using a food processor, process nuts, cake flour, and cornstarch for about 30 seconds. Then, pulse the mixture about 10 times to get a fine, powdery mixture. You’ll know the nuts are ready when they begin to gather together around the sides of the bowl. While you want to make sure there aren’t any large pieces, don’t over-process. Set aside.
Put the yolks in the bowl of an electric mixer, with the whisk attachment, and beat until thick and light in color, about 3-4 minutes on med-high speed. Slowly, add ¾ cup of sugar. It is best to do so by adding a tablespoon at a time, taking about 3 minutes for this step. When finished, the mixture should be ribbony. Blend in the vanilla and grated lemon rind. Remove and set aside.
Place egg whites in a large, clean bowl of the electric mixer with the whisk attachment and beat on medium speed, until soft peaks. Increase to med-high speed and slowly add the remaining ¼ cup of sugar, over 15-20 seconds or so. Continue to beat for another ½ minute. Add the yolk mixture to the whites and whisk for 1 minute.
Pour the warm butter in a liquid measure cup (or a spouted container). * It must be a deep bottom bowl and work must be fast.* Put the nut meal in a mesh strainer (or use your hand – working quickly) and sprinkle it in about 2 tablespoons at a time – folding it carefully for about 40 folds. Be sure to exclude any large chunks/pieces of nuts. Again, work quickly and carefully as to not deflate the mixture. When all but about 2 Tbsp. of nut meal remain, quickly and steadily pour the warm butter over the batter. Then, with the remaining nut meal, fold the batter to incorporate, about 13 or so folds.
With a rubber spatula, transfer the batter into the prepared pan, smoothing the surface with the spatula or back of a spoon. **If collected butter remains at the bottom of the bowl, do not add it to the batter! It will impede the cake rising while baking.
Tap the pan on the counter to remove air bubbles and bake in the preheated oven for 30-35 minutes. You’ll know the cake is done when it is springy to the touch and it separates itself from the side of the pan. Remove from oven and allow to stand for 5 minutes. Invert onto a cake rack sprayed with nonstick coating, removing the pan. Cool the cake completely.
*If not using the cake right away, wrap thoroughly in plastic wrap, then in a plastic bag, then in the refrigerator for up to 3 days. If freezing, wrap in foil, then the bag and use within 2-3 months.
Sugar Syrup
Makes 1 cup, good for one 10-inch cake – split into 3 layers
1 cup water
¼ cup sugar
2 Tbsp. dark rum or orange flavored liqueur
In a small, yet heavy saucepan, bring the water and sugar to a boil and simmer for 5 minutes. Remove from heat, add the liqueur. Cool slightly before using on the cake. *Can be made in advance.
Praline Buttercream
1 recipe Swiss Buttercream
1/3 cup praline paste
1 ½ - 2 Tbsp. Jamaican rum (optional)
Blend ½ cup buttercream into the paste, then add to the remaining buttercream. Whip briefly on med-low speed to combine. Blend in rum.
Swiss Buttercream
4 lg. egg whites
¾ cup sugar
1 ½ cups (3 sticks) unsalted butter, slightly firm
1 ½ -2 Tbsp. Grand Marnier or liqueur of your choice
1 tsp. vanilla
Place the egg whites in a lg/ bowl of a elevtric mixer and beat with the whisk attachment until the whites are foamy and they begin to thicken (just before the soft peak stage). Set the bowl over a saucepan filled with about 2 inches of simmering water, making sure the bowl is not touching the water. Then, whisk in the sugar by adding 1-2 tablespoon of sugar at a time over a minutes time. Continue beating 2-3 minutes or until the whites are warm (about 120 degrees) and the sugar is dissolved. The mixture should look thick and like whipped marshmallows.
Remove from pan and with either the paddle or whisk attachment, beat the egg whites and sugar on med-high until its a thick, cool meringue – about 5-7 minutes. *Do not overbeat*. Set aside.
Place the butter in a separate clean mixing bowl and, using the paddle attachment, cream the butter at medium speed for 40-60 seconds, or until smooth and creamy. *Do not overbeat or the butter will become toooooo soft.
*On med-low speed, blend the meringue into the butter, about 1-2 Tbsp. at a time, over 1 minute. Add the liqueur and vanilla and mix for 30-45 seconds longer, until thick and creamy.
Refrigerate 10-15 minutes before using.
Wait! My buttercream won’t come together! Reheat the buttercream briefly over simmering water for about 5 seconds, stirring with a wooden spoon. Be careful and do not overbeat. The mixture will look broken with some liquid at the bottom of the bowl. Return the bowl to the mixer and whip on medium speed just until the cream comes back together.
Wait! My buttercream is too soft! Chill the buttercream in the refrigerator for about 10 minutes and rewhip. If that doesn’t work, cream an additional 2-4 Tbsp. of butter in a small bowl– making sure the butter is not as soft as the original amount, so make sure is cool and smooth. On low speed, quickly add the creamed butter to the buttercream, 1 Tbsp. at a time.
Refrigerate in an airtight container for up to 5 days, or can be frozen for up to 6 months. If freezing, store in 2 16-oz. plastic containers and thaw in the refrigerator overnight or at room temperature for several hours.
Praline Paste
1 cup (4 ½ oz.) Hazelnuts, toasted/skinless
2/3 cup Sugar
Line a jelly roll pan with parchment and lightly butter.
Put the sugar in a heavy 10-inch skillet. Heat on low flame for about 10-20 min until the sugar melts around the edges. Do not stir the sugar. Swirl the pan if necessary to prevent the melted sugar from burning. Brush the sides of the pan with water to remove sugar crystals. If the sugar in the center does not melt, stir briefly. When the sugar is completely melted and caramel in color, remove from heat. Stir in the nuts with a wooden spoon and separate the clusters. Return to low heat and stir to coat the nuts on all sides. Cook until the mixture starts to bubble. **Remember – extremely hot mixture.** Then onto the parchment lined sheet and spread as evenly as possible. As it cools, it will harden into brittle. Break the candied nuts into pieces and place them in the food processor. Pulse into a medium-fine crunch or process until the brittle turns into a powder. To make paste, process for several minutes. Store in an airtight container and store in a cook dry place. Do not refrigerate.
Apricot Glaze
Good for one 10-inch cake
2/3 cup thick apricot preserves
1 Tbsp. water
In a small, yet heavy saucepan, bring the water and preserves to a slow boil and simmer for 2-3 minutes. If the mixture begins to stick to the bottom of the saucepan, add water as needed.
Remove from heat and, using a strainer, press the mixture through the mesh and discard any remnants. With a pastry brush, apply the glaze onto the cake while the cake is still warm. If the glaze is too thick, thin to a preferred consistency with drops of water.
Ganache Glaze
Makes about 1 cup, enough to cover the top and sides of a 9 or 10 inch layer or tube cake
**Ganache can take on many forms. While warm – great fudge sauce. While cool or lukewarm – semisweet glaze. Slightly chilled – can be whipped into a filling/frosting. Cold & solid – the base of candied chocolate truffles.
6 oz. (good) semisweet or bittersweet chocolate, like Lindt6 oz.
(¾ cup heavy cream
1 tbsp. light corn syrup
1 Tbsp. Grand Marnier, Cointreay, or dark Jamaican rum (optional)
¾ tsp. vanilla
½ - 1 tsp. hot water, if needed
Blend vanilla and liqueur/rum together and set aside. Break the chocolate into 1-inch pieces and place in the basket of a food processor and pulse until finely chopped. Transfer into a medium sized bowl and set aside.
Heat the cream and corn syrup in a saucepan, on low, until it reached a gentle boil. Once to the gently boil, immediately and carefully pour over the chocolate. Leave it alone for one minute, then slowly stir and mix the chocolate and cream together until the chocolate is melted and incorporated into the cream. Carefully blend in vanilla mixture. If the surface seems oily, add ½ - 1 tsp hot water. The glaze will thicken, but should still be pourable. If it doesn’t thicken, refrigerate for about 5 minutes, but make sure it doesn’t get too cold!
Assembling CakeCut a cardboard disk slightly smaller than the cake. Divide the cake into 3 layers and place the first layer top-side down on the disk. Using a pastry brush, moisten the layer with 3-4 Tbsp. of warm sugar syrup. Measure out 1 cup of praline buttercream and set aside.
Spread the bottom layer with a ¼-inch thickness of the remaining buttercream. Cover with ½ of the whipped cream, leaving ¼-inch border around the edge of the cake. Place the middle layer over the first, brush with sugar syrup, spreading with buttercream. Cover with the remaining whipped cream.
Moisten the cut side of the third layer with additional sugar syrup and place cut side down on the cake. Gently, press the sides of the cake to align the layers. Refrigerate to chill for at least 30 minutes.
Lift the cake by sliding your palm under the cardboard. Holding a serrated or very sharp night with an 8-ich blade held parallel to the sides of the cake, trim the sides so that they are perfectly straight. Cut a slight bevel at the top to help the glaze drip over the edge. Brush the top and sides of the cake with warm apricot glaze, sealing the cut areas completely. Chill while you prepare the ganache.
Place a rack over a large shallow pan to catch the ganache drippings. Remove the gateau from the refrigerator and put it the rack. With a metal spatula in hand, and holding the saucepan about 10 inches above the cake, pour the ganache onto the cake’s center. Move the spatula over the top of the ganache about 4 times to get a smooth and mirror-like appearance. The ganache should cover the top and run down the sides of the cake. When the ganache has been poured and is coating the cake, lift one side of the rack and bang it once on the counter to help spread the ganache evenly and break any air bubbles. (Work fast before setting starts.) Patch any bare spots on the sides with a smaller spatula, but do not touch the top after the “bang”. Let the cake stand at least 15 minutes to set after glazing.
To garnish the cake, fit a 12 – 14-inch pastry bag with a #114 large leaf tip. Fill the bag with the reserved praline cream. Stating ½ inch from the outer edge of the cake, position the pastry tube at a 90 degree angle with the top almost touching the top of the cake. Apply pressure to the pastry bag, moving it slightly toward the center of the cake. As the buttercream flows on the cake, reverse the movement backward toward the edge of the cake and finish by pulling the bag again to the center. Stop applying pressure and press the bag downward, then quickly pull the tip up to break the flow of frosting. Repeat, making 12 leaves evenly spaced around the surface of the cake.
Make a second row of leaves on the top of the first row, moving the pastry bag about ¾ inch closer to the center. The leaves should overlap.
Make a 3rd row, moving closer and closer to the center. Add a 4th row if you have the room. But, leave a 2-inch space in the center for a chopped filbert garnish. Refrigerate uncovered for 3-4 hours to allow the cake to set. Remove the cake from the refrigerator at least 3 hours before serving.
Leftover cake can be covered with foil and kept in the refrigerator for up to 5 days.
18 comments:
Ok the drool, I mean this is a monster of an incredible cake. Nice job.
your cake turned out great! I like you was like what is this recipe, i don't know what this is. it was fun and good job on getting it done a few minutes ago, that is usually how it is for me too!!
Well done on the challenge Bunny!! I am so in awe of you. I'm afraid that I didn't get this one done myself, what with having the huge wedding up at the big house to contend with at the beginning of the month and then going off on holidays. I shall do better next month! In the meantime I am drooling over your efforts! Well done you!
That's an incredible cake. I couldn't make it.
But I could sure eat it! :)
Great looking cake!
oh my goodness that last photo of your sliced filbert is so mouth-watering!! you baked this challenge like a pro!! im jealous LOL
Your a Daring Baker in every sence of the word! Great cake. :)
YAY! great job!
good for you, bunny! i would seriously love to bury my face in it. would that be wrong? :)
I'm hysterical about your reference to the burlesque dancer's skimpy clothes. Your cake is a winner. Wasn't it fun - except for the last minute stress.
Beautiful job on your DB challenge. The cake looks mouthwatering! Love all your pics!
Bunny-that is SOME decadent looking cake! Hope you saved me a piece....I'll start over now!!! :)
GREAT JOB Sis!!!!!!!!!!!!
everything you bake looks so good, I feel like AT&T I could reach out and touch it..
Yay Bunny!! You did it! (Not me this month!)
That handprint is a good signature!
Delicious! You did an amazing job on your challenge!
I've seen other people's cakes on this challenge, and I have to say that I think yours is the prettiest!
Your cake looks awesome! I love the almond too!
Great cake! I love how fluffy yours turned out!
Post a Comment